Thursday, June 14, 2012

Choco-mint cupcakes


Lately, I've been hung up on mint, like there's no tomorrow. (OK, besides my mint smokes. Bad, bad, bad Dijana.)
Out of the gazillion (and then some) cooking books around the house, I couldn't find one thing that appealed to me mint-wise, so I decided to experiment. 
Earlier in the day while running an errand, I took a quick turn to the supermarket and a bottle of green food coloring caught my eyes. Pretty, I thought, but then I do like green (a lot), so of course that green equals pretty. I picked up a couple of odd things and the tiny bottle with the green color too. What's better than having a minty idea and getting a bottle of green food color, eh?

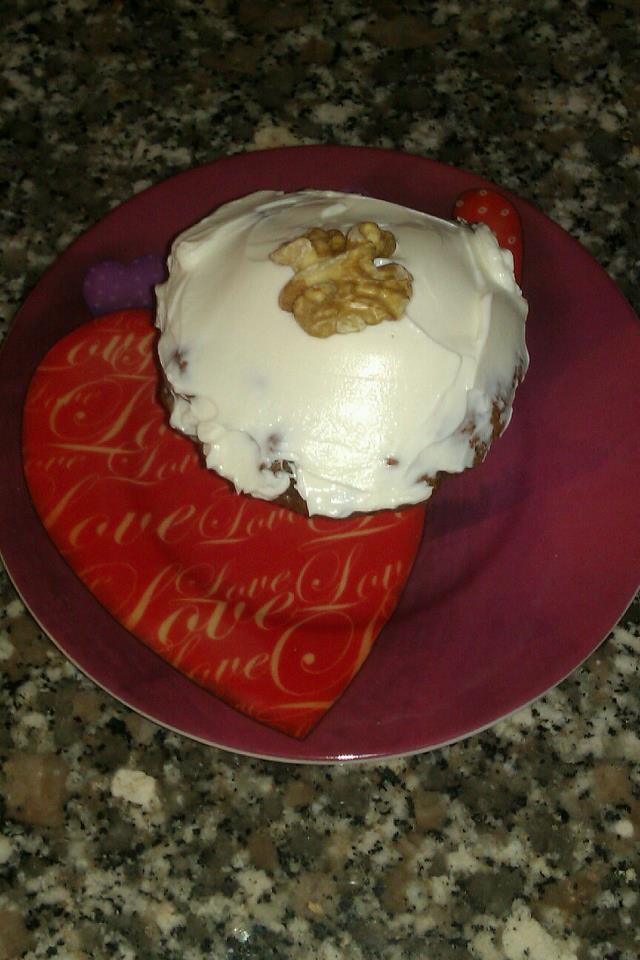
Well, I still had bunch of errands to run, but I had about 2 hours to kill at home, so the choco-mint cupcakes were born. Oh so light, oh so fluffy, oh so delicious *HUGE smile*, oh so NOT green *sad, sad, sad face*.

However, the lack of 'greenery' didn't affect the taste, so it is worth sharing the recipe. I cannot stress enough, use your trusted brand of coloring, do not try new one just because it looks pretty.

For 6 cupcakes (regular size, or slightly smaller than regular) you will need:

50 grams unsalted butter (at room temperature)
50 grams of sugar
50 grams plain flour
1 teaspoon baking powder
1/2 teaspoon baking soda
1 large egg
1 heaped tablespoon (unsweetened) cocoa powder
1 tablespoon of milk
1/2 teaspoon vanilla essence
1 teaspoon mint extract
1 teaspoon green food coloring (your trusted brand, NOT the one that looks pretty in the bottle)

Method:

Preheat the oven to 180 degrees Celsius.

Mix the flour with the baking soda and baking powder and set aside. Beat the butter and sugar until pale and fluffy. Add the egg and beat well until amalgamated. Add the flour and then the milk while still beating.
When all is well amalgamated, divide equally between 2 bowls. Beat the cocoa powder and vanilla essence in one and the mint extract and the green food coloring in the other.
Line muffin tin with paper cases and spoon alternatively of both colors into the cases. With a toothpick, give a little swirl, but do not overdo it, it has to be green AND brown.
Bake 18-20 minutes (depending on your oven, or until toothpick inserted in the centre comes out clean).
Cool about hour or so before frosting, if you decide to frost them, although they're delicious even without the frosting.

Monday, June 11, 2012

Microwave made Strawberry jam

Sometimes I wonder if it's 'old' age catching up with me or it is simply the fact that I have too many things, that I'm getting forgetful. Scary thought, either way.
So, I'm rummaging through the fridge and searching for that blasted piece of cheese that I know I have and it pops out a whole box of strawberries! I had forgotten that I bought them!


I don't like wasting food, so I decided to see what can be saved. Out of 600 grams of strawberries, I managed to come up with 400 grams of a bit sad strawberries, but I wasn't in the mood to eat them. Looking through some magazines, I came upon a recipe for strawberry jam made in a microwave oven. Well, it was time to try it. I adjusted the quantities and I came up with a full jar and 2 teaspoons of pure delight.


Ingredients:


400 grams of strawberries
55 ml lemon juice
300 grams jam sugar (or caster sugar)


Method:


Put the strawberries into a deep dish and put them in the microwave on high setting for 4 minutes. Remove them and add the sugar and the lemon juice. Make sure that the dish is really DEEP, as the melting sugar and the juices will rise.
Set the microwave oven to high and the timer to 20 minutes.
Voila! You've got yourself a strawberry jam! Pour into a sterilized jar, seal and let it cool completely. Refrigerate after it has cooled down. It won't last ages, as it doesn't have preservatives, but that's good for you :) 


Sunday, June 10, 2012

Gluten free cupcakes (Almond cupcakes)


Ingredients:


300 grams ground almonds

2 teaspoons sea salt

1 teaspoon bicarbonate of soda

1 tablespoons ground cinnamon

1 teaspoons of ground nutmeg

1/4 cup olive oil

3 tablespoons demarara sugar

5 large eggs

125 grams grated carrot

100 grams crushed pineapple

150g sultanas or raisins

handful of chopped walnuts (optional)


Method:

Preheat the oven to 170C

Whisk lightly by hand: the eggs, the oil and the sugar until they are completely combined.

In another bowl mix the almond with the spices, salt, carrots, dried fruit and nuts (if using).

Mix both together until thoroughly incorporated.

Place a tablespoons each of this mix into silicone muffin shapes: there should be exactly for 12.

Bake for around 20-25 minutes or until a toothpick comes out clean. Let the cakes cool

thoroughly (around an hour) and then smear with a cream cheese frosting: a mix of cream cheese and, if you like, icing sugar (or even sweetener: since there is no cooking involved it will keep its flavour). Decorate if you like.


Pindjur

If there's one thing I sincerely miss from my homeland, it would be pepper. Not the black pepper or the bell pepper or whatever. The one called 'banana pepper'. Subtle and mild taste, the lovely crunch and the yellow/green color. Oh, and the versatility!
In 12 or so years I have been living on this little rock, once only I found these peppers in supermarket. And that was it. Never again.


Just a couple of weeks ago, while shopping for fruit and vegetables, I found some green (bell) peppers that looked well, a bit strange. They were quite light of color and the flesh wasn't as thick. Got me a couple, I like throwing them into salads. Our summers aren't cook friendly.
So I was going through the fridge and thinking what to do for lunch, and then, I found my funny green peppers, 1 red and 1 yellow pepper. I decided to make my very favorite pepper dish, Pindjur (pronounced pin-joor for the English speaking world).
If peppers and tomatoes could dream, their dream would be to be made into pindjur. Yeah, it is THAT good. All you need is a piece of white (Feta style) cheese and some crusty bread. Forget forks, forget manners and dip your heart out. I know I did.
I'm not going to give you quantities and persons of number serving size, but there's a rule. The more-the better. Oh, and it tastes soooo lovely the day after... when all flavors have mixed.
The original recipe calls for the above mentioned 'banana' peppers, but nothing wrong with the regular green ones. 


3 large green peppers
1 large yellow pepper
1 large red pepper
1 chilli pepper (optional, for those that like it hot)
3 cloves of garlic 
4 large tomatoes
salt to taste
4 tbsp olive oil (any vegetable oil will do)


Method:


Roast the peppers in the oven until they have the skin blackened. Turn them several times, so they blister nicely on all sides. Close them in a plastic bag (or pot with lid) and let them cool down. Peel off the skin, remove the seeds and tear them into strips with your hands.
Cut up the tomatoes into small chunks and set aside.
In a mortar and pestle, ground the garlic with little salt into a paste. Add the pepper strips and pound and ground. Don't overdo it, you still need some texture. Add the tomatoes and continue pounding and grounding. 
Pour the contents into a deep dish and add salt to taste.
In a separate dish, pour the oil and bring it to sizzling point. Remove from heat and pour over the pindjur. Mix well. If you're using chilli, add thinly chopped chilli just before you add the oil.
Serve with crusty bread and a chunk of white cheese.


Saturday, June 9, 2012

Persian rose water ice cream

For the fast version of this wonderful ice cream, you will need:


1 litre vanilla ice cream
1 pinch of saffron (about 100 micrograms)
1 tablespoon hot water
1 tablespoon rose water
4-5 tablespoon shelled and chopped pistachios


Method:


Let the ice cream soften at room temperature for about 10 minutes. Mix the saffron in the hot water and add to the ice cream.
Add the rose water and pistachios and mix well to combine.
Return to the freezer for 3-4 hours before serving.
Scatter some chopped pistachios on top and enjoy!


Tuesday, June 5, 2012

Glutton's Heaven (aka Chocolate zucchini cake)


I had prepared a long rant before I wanted to share the recipe. Now, it is all forgotten.
Why, you ask?
Let me tell you why.
Because I just ate a slice of what seems the most wonderful cake in heaven, hell, Earth, Middle Earth and the Universe, that’s why.
I’m in glutton’s heaven and the world is at peace. Birds are chirping, the breeze is swaying the curtains and wonderful smell of spices fills my house.
Because I’m up to my elbows covered in cocoa, chocolate and spices.
Because I was able to forget my troubles for blissful couple of minutes and enter a different dimension, preceded by explosion of flavours on my tongue. A feast for all senses allright. Almost, just almost as good as s*x.
And now, I’m not going to taunt you, but will share the recipe for:

Chocolate zucchini cake

Ingredients for the cake:

1 cup vegetable oil
1 cup of light muscovado sugar
1 ½ teaspoon vanilla essence
1 teaspoon baking soda
½ teaspoon baking powder
½ teaspoon salt
2 large eggs
½ cup of yogurt
2 cup of all-purpose flour
½ cup of unsweetened cocoa powder
2 teaspoons of espresso powder
2 cups of  grated zucchini
½ cup of dark chocolate chips (70% cocoa)
seeds of 6 cardamom pods, ground with a mortar and pestle
¼ tsp ground cinnamon


Ingredients for the ganache:

1 cup of heavy cream
1 ½ cup of chocolate chips
generous knob of butter at room temperature

Method:

Preheat the oven to 170 degrees Celsius. Grease your baking pan and dust with cocoa. Shake the excess.  In a bowl, sift the flour, baking soda, baking powder and salt. In a separate bowl, cream together the oil, sugar & vanilla. Beat in the eggs one at a time until well combined. Stir in the yogurt alternately with the flour mix. Then add the cocoa and espresso powder and the spices, mixing well until smooth.
At the end, fold in the zucchini and the chocolate chips. Spoon the batter into the baking dish. Bake the cake for 35-40 minutes or until a wooden skewer or a toothpick inserted in the centre comes out clean. Remove the cake from the oven and cool in the pan for 5 minutes. Run a knife around the edges of the dish and transfer the cake on a wire rack.  Cool for hour or so before pouring the ganache.
To prepare the ganache, scald the cream in a saucepan over medium heat. Remove from heat and pour in the chocolate chips. Stir until completely combined and glossy. Add the knob of butter and let it cool.


Monday, June 4, 2012

...Let me play among the stars

I sincerely cannot explain my fascination with stars. Not the people that we call stars, but the real deal and the geometrical shape.
Every time I talk on the phone (usually with my mother, as those calls are really, really long), I have piece of paper and a pen and doodle stars and hearts. Maybe it's the child in me, never wanting to grow up, attracted to all things cute, shiny and pretty.
So, when I got a baking magazine and found a recipe for star shaped cakes, that day, my world was complete.
The recipe is adapted from 'Baked & Delicious'.
If you don't have little star shapes, you can always make cupcakes :)

Espresso flavored star-spangled bites

Ingredients for the sponges

50g unsalted butter at room temperature
100g caster sugar
125g plain flour
1 1/2 tsp baking powder
a pinch of salt
95ml milk
2 tsp espresso (or any instant coffee granules)
2 tbsp hot water
1 large egg
1/2 tsp vanilla extract

Ingredients for the buttercream

50g unsalted butter at room temperature
125g icing sugar, sifted
1 tbsp milk
a few drops vanilla essence

Equipment:

Star shaped silicone mini moulds

Method:

Preheat the oven to 170 degrees Celsius.
Put the butter, sugar, flour, baking powder and salt into a bowl and beat to fine crumb consistency with electric whisk. Pour in half of the milk and beat until just combined.
Dissolve the coffee granules with 2 tbsp of hot water. Add the coffee, egg and vanilla to the remaining milk and whisk together. Pour this mixture into the batter and mix until smooth.
Use a teaspoon to fill the moulds. Bake for about 10-12 minutes, until the tops are springy to the touch.
There should be enough batter to make 36 stars.

For the buttercream, beat the butter with electric whisk until fluffy and light. Gradually add the sifted icing sugar, milk and vanilla essence. Beat until pale and creamy.

Cool the star-spangled bites on a wire rack for about 50-60 minutes and then spread or pipe some buttercream and decorate as you wish.